In order to maintain a healthy mouth, daily dental hygiene is essential. However, brushing alone is not enough, as a conventional toothbrush only removes about 40% of the dirt.
An irrigator ensures a 99.9% more effective cleaning, as well as a greater sensation of freshness. But how should you use your dental irrigator to achieve a good result?
Dental Irrigator User Guide
With this guide, you will discover the correct procedure to follow each time you decide to use the dental irrigator and everything about its usage:
Step 1 – Connect or charge the irrigator
The first thing to do after taking it out of the box is to connect the irrigator to a power source, in the case of a tabletop model, or charge it for about 4-5 hours if it is a cordless irrigator.
Faucet irrigators do not need to be charged; you only need to install the filter on the faucet to connect the tube.
Step 2 – Fill the reservoir
Fill the reservoir with warm water. Why warm water? High-pressure water can be very uncomfortable, and using cold or hot water can produce an unpleasant sensation during the cleaning process.
Step 3 – Choose the nozzle
Depending on the model, you will find different types of nozzles that you can use during the cleaning:
Standard: Used to clean the teeth and remove food debris between the teeth.
Pick Pocket: Used for gum care after periodontal treatment. Its design helps reach the gums, periodontal pockets, or around implants more effectively.
Orthodontic: Specifically designed to clean between the metal filaments of dental appliances or braces, thanks to its filament-tipped design.
Plaque: Equipped with three tufts of bristles at the tip, it gently removes plaque around implants, bridges, or crowns.
Periodontal: Shoots a jet through its rubber tip, helping to clean the affected area while avoiding damage to sensitive areas of the mouth.
Oxyjet: These are exclusive to the Oral-B brand, projecting microbubbles that improve cleaning while reducing discomfort. It can also be used for gum massage.
Tongue: Has a flat shape and is used to remove white coating from the tongue, eliminating toxins and germs. To attach the nozzle, apply gentle pressure to the handle until you hear a “click.”
Step 4 – Remove air from the irrigator tubes
This step is very important and essential for the proper functioning of the irrigator: Select the maximum pressure level and press the irrigator button to remove the air from the tubes.
Otherwise, the first time you use it, even if you have selected the lowest level, the jet pressure can be very strong.
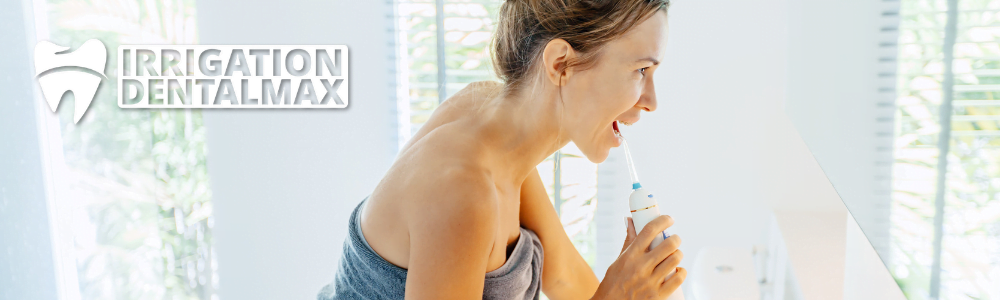
Step 5 – Position yourself
Finally, we start with the actual process of how to use the dental irrigator: Lean over the sink to prevent the jet or splashes from falling on the floor and position the irrigator with the tip pointing downwards into your mouth.
Step 6 – Select the pressure level
In the case of tabletop irrigators, you can choose the level by turning a wheel. In cordless models, you will need to press a button to select a level from 1 to 5.
Step 7 – Choose the usage mode
This step is similar to the previous one; tabletop irrigators have a wheel to choose the mode to use. On the other hand, portable irrigators have a second button (in smaller models, it is the same power button) to select from three modes.
Step 8 – Turn on the irrigator
Press the ON button or, if applicable, the power button to start the irrigator.
Step 9 – Perform the cleaning
Now that you know how to start the dental irrigator, but how do you use it? The correct way to use it is to follow the gum line.
In other words, direct the water jet along the line that the gums form around the tooth, covering the top of the tooth, the gum base, and all the interdental spaces.
Approximately, the jet should make contact with each tooth for about 2 seconds. After finishing with the outer part, stop the irrigator and rotate the nozzle to begin with the inner part.
Step 10 – Turn off the irrigator and empty the reservoir
Now you know how to use an oral irrigator, but there is something you should never forget: Turn it off and empty the reservoir after each use.
Leaving water in the tank could lead to the growth of germs and toxins, which could contaminate the container and reduce the effectiveness of the device.
Some tips on how to use the dental irrigator
Using a dental irrigator is quite simple, as you may have noticed in the previous section.
Including it in your daily oral hygiene routine can benefit you, but keep in mind some details:

- The irrigator is not a substitute for a toothbrush: In other words, using an irrigator does not mean you should stop brushing your teeth. You should always use it after brushing for maximum effectiveness.
- Do not overuse the irrigator: Experts recommend not using the irrigator for more than 5 minutes every 2 hours to avoid potential damage to the teeth.
- Detection of wounds or ulcers: If you have a wound or ulcer in your mouth or on your tongue, you should not use an irrigator as the jet could harm or enlarge the wound.
- Maintaining the irrigator: After each use, it is recommended to clean the reservoir to prevent the growth of bacteria. Also, clean and store the nozzle in its compartment to prevent exposure to air and potential contamination. Some models, such as Waterpik irrigators, have a small compartment in the lid to store the nozzles and keep them protected.
- Use of dental floss: If you are going to use dental floss, always do it after using the irrigator to make it easier to remove any food debris that may be trapped between the teeth.
- Cleaning the dental irrigator: After using the dental irrigator, you should empty and clean the reservoir. But what about cleaning the device itself? It should be done at least twice a month.